
My Student Pasco
Great news! Our student system, My Student Pasco, just got a significant upgrade! It’s super user-friendly, making it easy for everyone to navigate and complete tasks quickly. Do you have questions or need a hand using it? Drop us an email at [email protected]. Our ticket system guarantees a swift response from our team. We’re committed to making your experience with myStudent awesome, and we’re here to support you every step of the way!
Enrollment in my student Pasco
We’re diving into signing up for my student Pasco with a complete, easy-to-follow guide.
ADDING A NEW STUDENT
Student Menu > Add Student
- Initiate your search by entering at least two letters in the name boxes and the student’s birthdate.
- Click on the “Search” button.
- You can add a new student by typing in their full name if there are no records. Click the “Enroll New Student” button to finish.
Remember: You’ll get your mypascoconnect student number once you enroll.”
- Click ‘Enroll New Student’ to start the process.
- You’ll move to the address page.
- Type in the student’s address.
- In the box next to it, pick the best options.
Important: All students except for SIT students should have their primary address on file.
- If the address you put down isn’t incorrect or the system doesn’t recognize it, a dropdown menu lets you OVERRIDE it. Usually, Option A is the pick for most sign-ups—it’s called Controlled Open Enrollment.
2- Proceed with the required enrollment information:
- Enrollment details: Date and code
- Previous school information: From different locations (city, state, or country)
- Immunization status: Confirmation of required vaccinations
- Home Language Survey date: Languages spoken at home
- Personal information: Gender, place, state, and country of birth
- Communication preference: Preferred language
- Race and ethnicity information
- Health examination status
- Complete immunization dates
- Bus request: Transportation needs
- Educational zone allocation: School choice specification for students outside the county, indicating district preference over a specific school.
3 -Registration complete: The student’s enrollment process is successfully finished.
- Select “Proceed to the Student Dashboard” to access your student’s academic information or “Transfer/Enroll another student” to handle additional enrollments or transfers.

ENROLLING AN INACTIVE STUDENT
Important: If the student is attending another school, please contact that school and ask them to withdraw the student officially. Once the student is successfully removed, you can follow these steps.
Student Menu > Add Student
- Start by typing in at least two characters in the name fields and the student’s date of birth.
- Press the “Search” button.
- If the system finds a match and the student isn’t enrolled in another Pasco school, their status will be inactive, displaying their drop date, drop code, and final grade level.
- If the displayed student is the correct one, click “Enroll” to begin the enrollment process.
- Update and fix any required enrollment fields: Grade Level, Enrollment Date, and Enrollment Code.
- Save the changes and proceed to the Student page to finish enrollment updates.
- Update relevant demographic information.
- Update addresses and contacts.
- Ensure health immunizations are up to date.
- Specify if bus transportation is needed (Yes or No) on the Transportation Summary.
- Provide ESE/ELL information if applicable.
- Update the student’s schedule.
SECOND SCHOOL OF ENROLLMENT
Sometimes, students join two schools in one school year.
- For example, a student might start middle school and plan to move on to high school soon. This can be exciting and full of possibilities for personal and academic growth. With hard work and determination, this student is eager to make the most of their education and study well.
Go to your primary school enrollment tab to enroll in the second school.
- Select the correct Year.
- Choose the second school you want to enroll in.
- Put in the accurate enrollment date and code.
- When you’re signing up at the beginning of the academic year, stick with the enrollment code from your primary school.
Important: It’s crucial to scroll to the right and tick the box in the “Second School” section.
Students in two schools can view their schedules and grades from both places.
However, if a student decides to leave their primary school, they must specify the date and reason in the “Second School” section. It’s a good idea to talk to the second school before deciding to withdraw a student. Once all the required info is provided, click the “SAVE” button to move.
Please note that some schools have their way of handling enrollments in a second school, so this rule might not apply to them.
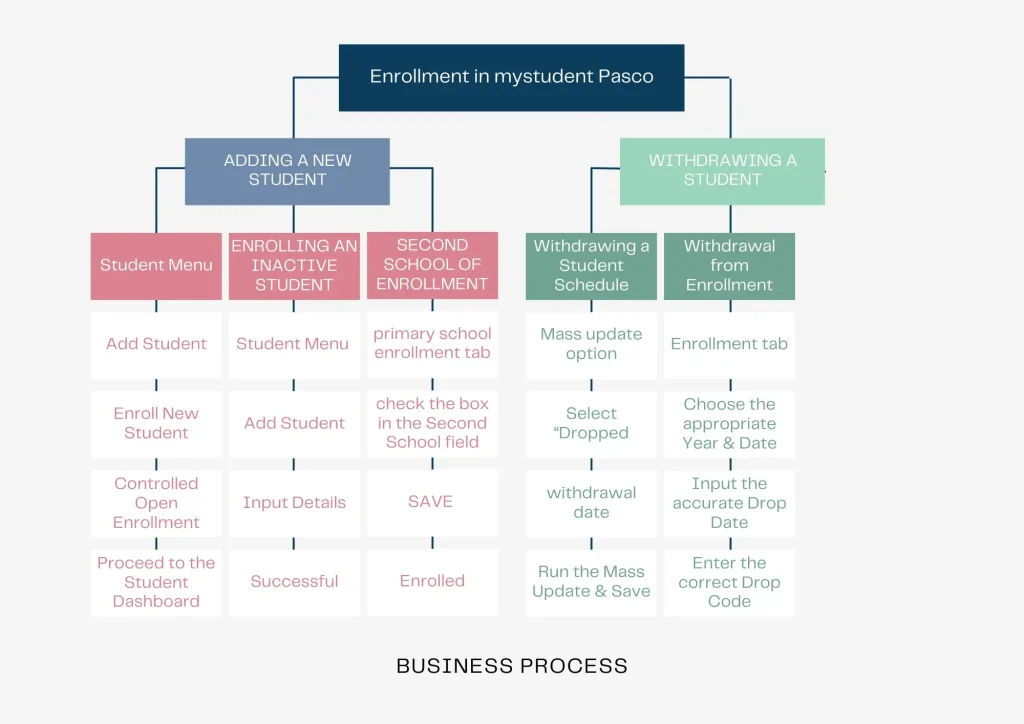
WITHDRAWING A STUDENT
When a student leaves your school, it’s important to quickly check their schedule and take them out of their classes before officially removing them from enrollment. This is vital to keep your records accurate and might require explaining things to the student and the administrative staff.
Withdrawing a Student Schedule
Enter a drop date for each course separately OR
- Opt for the Mass update option.
- Pick “Dropped” from the drop-down menu.
- Select the accurate departure date.
- Perform the Mass Update function.
- Keep the changes by saving them.
Withdrawal from Enrollment
- Head to the Enrollment tab.
- Choose the correct Year and School to remove the student.
- Please put in the exact date they’re leaving.
- Please enter the correct code for the reason they’re leaving.
Remember, when a student leaves the school system, the date they officially leave should differ from when they started. The withdrawal date marks when the student is no longer part of the school records in myStudent. This date could be their last day attending or a period when they’re not present. But, here’s an exception: if a student is marked as a ‘No Show,’ which means they never actually attended, the withdrawal date is set to be the same as the enrollment date.
ADD/DROP REPORT
The Add/Drop summary shows the most recent changes in who’s joining or leaving your school.
You can find this info by going to Students > Add/Drop Report and entering the dates you want to check. This will give you all the details about who enrolled or left during that time.
Conclusion
Finally, the new Student Pasco info system is a big deal for improving school life for students and parents in the district. It’s made easy to use, with a team ready to help. As Pasco County Schools keep focusing on being great academically, myStudent is vital for giving students and parents what they need to do well.
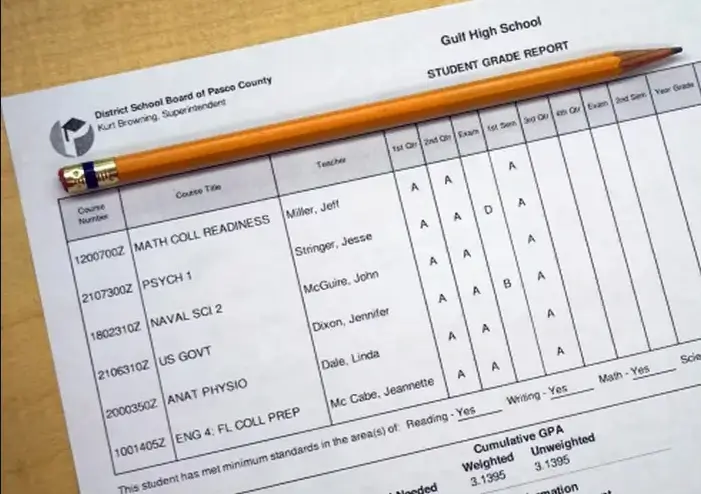

![Pasco County School Grades [ Criteria Updated ]](https://my-pasco-connect.com/wp-content/uploads/2023/11/Pasco-County-Schools-Grades-2.webp)